
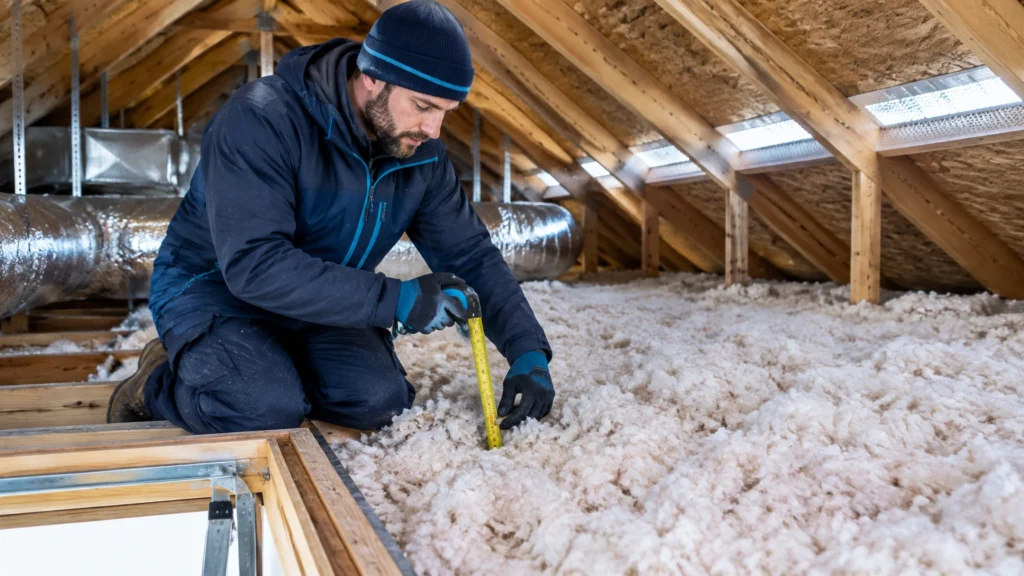
A quick attic check before winter can help uncover insulation gaps, moisture issues, blocked vents, and other problems that are easier to address before the cold settles in. Homeowners in Western Kentucky, including Murray, Mayfield, and Paducah, Kentucky, can use this checklist to spot concerns and decide when it is time to call a professional.
An attic inspection does not mean climbing over joists or disturbing materials. If access is unsafe, the attic is difficult to move around in, or you see signs of damage, leave the inspection and any repairs to a qualified professional.
1. Check insulation depth and condition
Look at the insulation from the attic access or another safe location. Is it spread evenly across the attic floor, or are there bare spots and low areas? Has loose-fill insulation settled? Are batts flattened, shifted, wet, or pulled away from the areas they should cover?
Use a ruler to check depth in a few accessible places, but do not treat depth alone as a complete performance assessment. The right amount depends on the insulation material and the home. A professional can identify the material, evaluate coverage, and recommend a suitable plan for energy efficient home insulation.
Common attic options include:
- Blown-in fiberglass or cellulose, which can cover broad attic-floor areas and reach around joists and other obstacles.
- Fiberglass batts, which are often used in regularly spaced cavities and need to fit without gaps or compression.
- Spray foam, which may be suited to specific air-sealing or roofline applications, depending on the attic design.
Learn more about Armored Insulation’s batt insulation and spray foam insulation. The right material and installation approach depend on the conditions in your attic.

2. Look for gaps around wires, ducts, and top plates
Insulation slows heat transfer, but it does not necessarily stop air from moving through openings. From a safe vantage point, look for visible gaps where wires, pipes, ductwork, or other services pass through the attic floor. Also look along the tops of interior and exterior walls, where the ceiling drywall meets the framing.
These openings may let warm indoor air move into the attic. Fibrous insulation should not be used as a substitute for air sealing; the gaps need an appropriate sealant or blocking method. Some locations require extra care, especially around electrical components, recessed lights, chimneys, and other heat-producing equipment. Don’t apply spray foam or other materials around these features unless the product and installation method are suitable.
For more detail, see the Department of Energy’s attic air-sealing and insulation checklist.
3. Check the attic hatch or pull-down stairs
The attic opening can be a weak spot in the insulation and air barrier. Look for visible gaps around the frame, worn weatherstripping, or a hatch that does not close snugly. If you have pull-down stairs, check that they close fully and that the frame is not visibly loose or damaged.
An attic hatch should be properly sealed and insulated without interfering with its safe operation. If insulation around the opening is thin, displaced, or falling away, note it for a professional assessment rather than balancing insulation on the hatch or stairs.
4. Watch for moisture, mold, and pests
Before adding insulation, look for signs that the attic needs repair or further inspection. Warning signs include:
- Water stains on the roof decking, rafters, or ceiling below
- Damp, clumped, or discolored insulation
- Visible mold-like growth or wood that appears soft or damaged
- Pest droppings, nesting material, or chewed insulation or vapor-barrier materials
A roof leak, plumbing issue, or exhaust fan venting into the attic should be addressed before new insulation is installed. Covering a moisture problem with fresh blown-in insulation or batts can make it harder to find and resolve. If you see vermiculite (often a lightweight, flaky material) do not disturb it; it may contain asbestos. ENERGY STAR recommends consulting a professional about moisture-damaged attics and other potential hazards before proceeding with an insulation project. Read its attic insulation project guidance.
5. Check ducts and exhaust outlets
If heating and cooling ducts run through the attic, look for sections that appear disconnected, crushed, poorly supported, or damaged. Check for obvious gaps at joints, but do not tug on ducts or move equipment. Ducts should also remain accessible for inspection and service, not buried under loose insulation.
Confirm that bathroom and kitchen exhaust fans vent outdoors, not into the attic. If you cannot trace where a vent goes, make a note and ask a qualified professional to check. Moist indoor air released into a cold attic can contribute to condensation and damage.

6. Make sure eave ventilation is clear
In a vented attic, soffit vents help bring outdoor air into the attic, while other vents, such as ridge or gable vents, provide an outlet. Insulation should not block soffit vents. Baffles, also called rafter vents, help preserve an airflow channel at the eaves while allowing blown-in insulation or batts to cover the attic floor more completely.
From a safe position, look for insulation pushed into the eaves or signs that airflow paths may be blocked. Do not remove roofing, pull insulation around wiring, or enter a tight space to inspect the baffles yourself. The ENERGY STAR guide to attic ventilation explains why keeping soffit vents clear matters.
7. Plan repairs before the cold arrives
A winter-prep check can reveal several different needs. Some attics may need only a small repair; others may need air sealing, improved ventilation, insulation added or replaced, or an inspection for moisture or pest damage. The best sequence is to resolve roof or moisture problems, address ventilation and air leaks, and then determine whether the insulation needs topping up or replacement.
Blown-in insulation is often used for attic floors because it can fill around framing and obstacles. Batts may suit certain cavities if they fit correctly. Spray foam can be appropriate for some applications, but it is not a one-size-fits-all attic solution. Armored Insulation can help homeowners understand the options and whether insulation removal and replacement may be needed when existing material is damaged or has settled. See the company’s insulation removal service.
Homeowners in Murray, Mayfield, Paducah, Kentucky, and across Western Kentucky may find it helpful to plan ahead, particularly before the first sustained cold weather. Scheduling early gives time to assess the attic, discuss the right materials, and arrange work before contractor calendars fill up.
Get your attic ready for winter
A clear, safe inspection can help identify what needs attention, but attic work often involves electrical wiring, ventilation, moisture, and fall hazards. When you find a problem, or cannot safely see enough to judge the condition, ask an experienced insulation professional to take a closer look. Armored Insulation provides residential attic insulation services throughout Western Kentucky, including Murray, Mayfield, and Paducah, Kentucky.
If you would like help assessing your attic or discussing blown-in insulation, batts, spray foam, or insulation replacement, send us a service request. We’ll be glad to learn more about your home and help you consider the next step.